Hosted a static website on Google Cloud bucket using cloud storage, https load balancer, domain DNS service
Enable Cloud Storage
- First of all, I have to activate the Google Storage service on my Google Cloud project
Create a new bucket
Now, I went to the Cloud storage and click on create a new bucket.
- I assign a unique name for the bucket, it doesn’t matter the name I assign to the bucket since with a DNS record I’ll redirect it to a more friendlier path.

- For the location where our data will be saved, I’ll select only regional and the region closest to me.
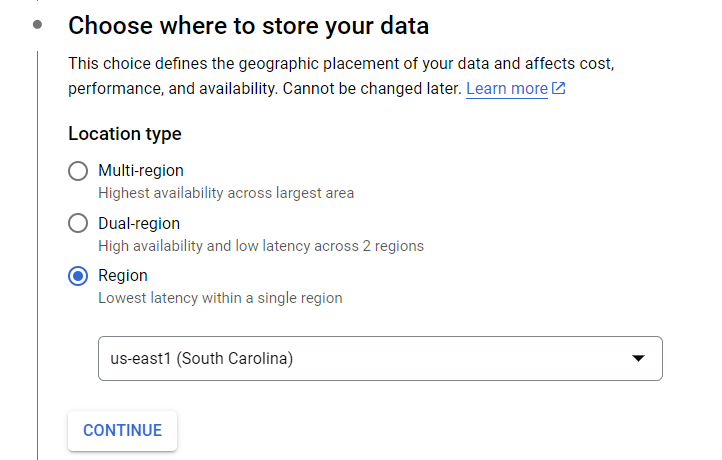
- For the bucket class I’ll select Starndard because as the bucket will function as a host, the information will be constantly accesed and the standar class is the best for data that would be accessed regularly.

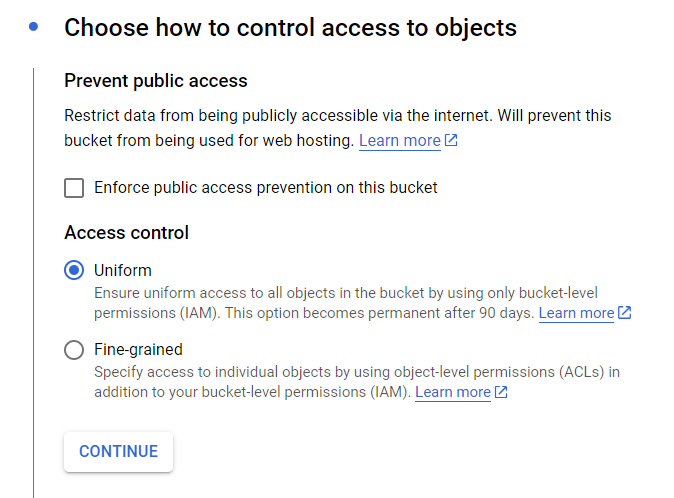
- For the control access, we only will uncheck the prevent public access option, since users will need to access to the bucket.
- Finally, I’ll click on the create button, to create the bucket.
Upload files
Now, I have downloaded a website template to perform this test and will upload to the bucket, this can be done using the GUI or using the gsutil command.
1
gsutil cp my-file-or-folder gs//bucket-name
Configuring Permission
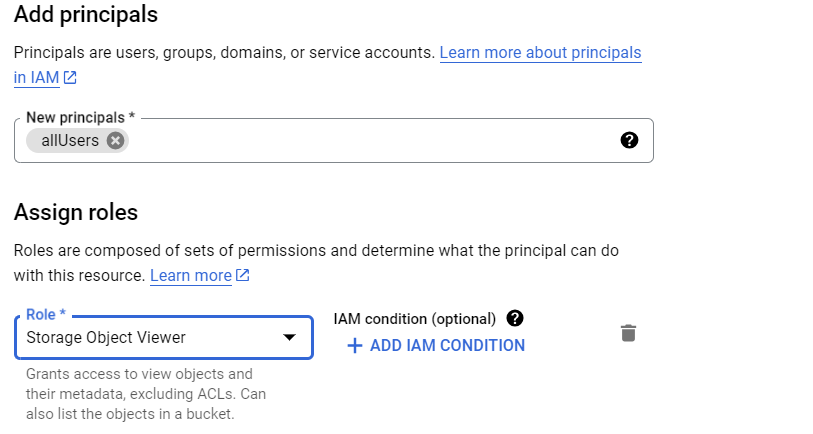
We will need to ensure the security of the files, so next steps are:
- Go to the bucket and select permission, then click on Grant access and assign the role viewer to allusers.
Configure static host
Next, configure the static web index file by selecting the three-dot icon on the bucket and then click on edit website configuration.

Now, copy the URL and paste it in a new tab, we will be able to see the website.
Configuring a load balancer and a SSL Certificate
- Go to Netwrok Services and click on Load balancing, we will create a Application Load Balancer (HTTP/S)
- For Interent facing or internal only configuration we will select From internet to my VMs or serverless servicess
- For Global or Regionl configuration we will select Global external Application Load Balancer.
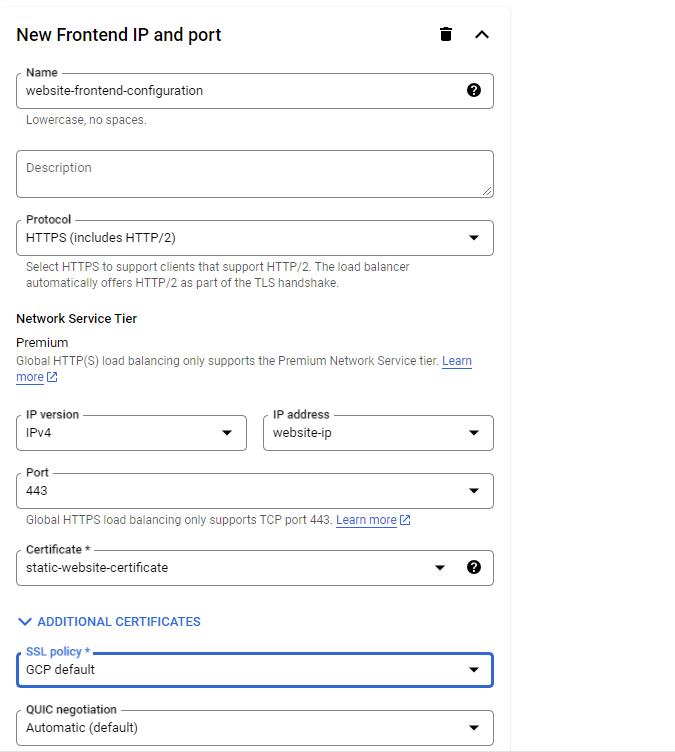
Frontend Configuration
- For the Frontend configuration, we will add a name for the front end configuration.
- For Protocol, we will select HTTPS (incluye HTTP/2).
- For the IP version, we will select IPV4 and for IP Direction we will reserve a new static IP, then click on Reserve.
- For port configuration we will select 433.
- In the Certificate dropdown menu, we will click on it and select create a new certificate managed by Google.
- For the domain configuration, we put the address that we want to use with our domain.
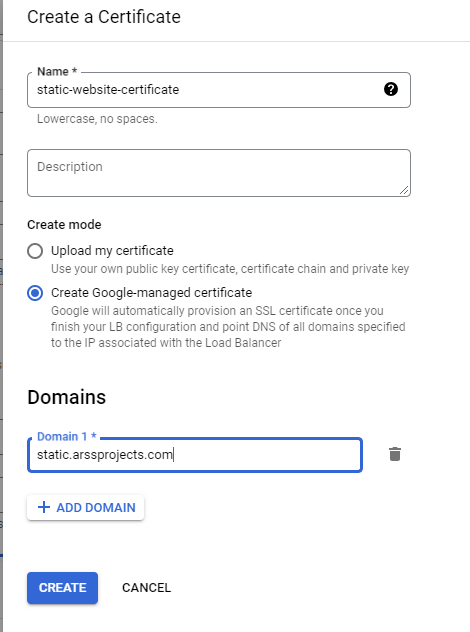
- Then, we create our frontend configuration.
Backend configuration
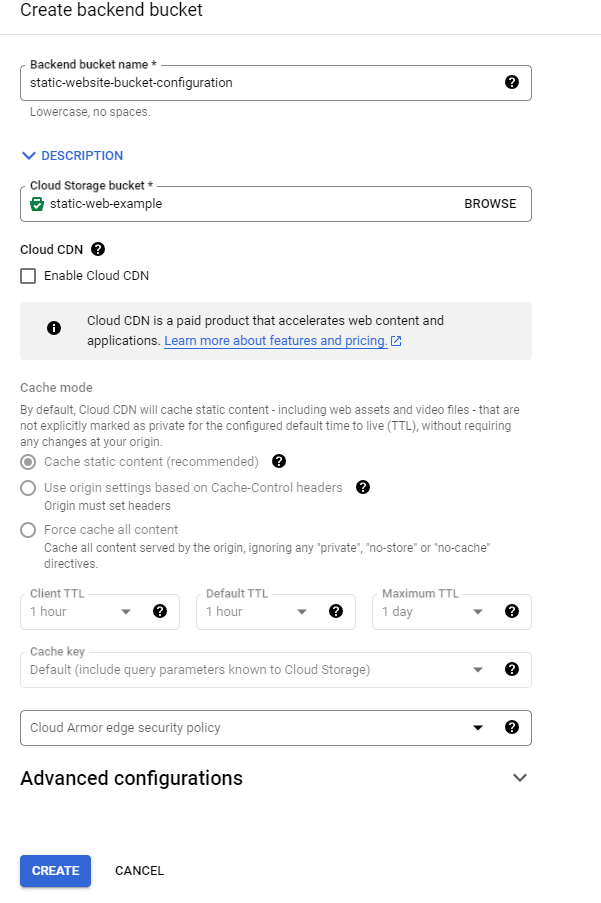
- In the Backend configuration we will click on the Backend services & backend buckets dropdown menu and select Create a backend bucket
- We will assign a name for the backend bucket.
- And now click on the browse option and will select our bucket that works as the host.
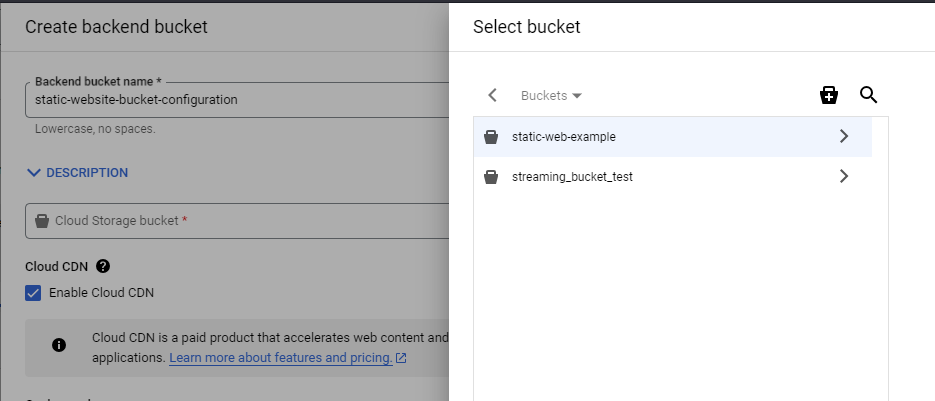
- Then, click on Create.
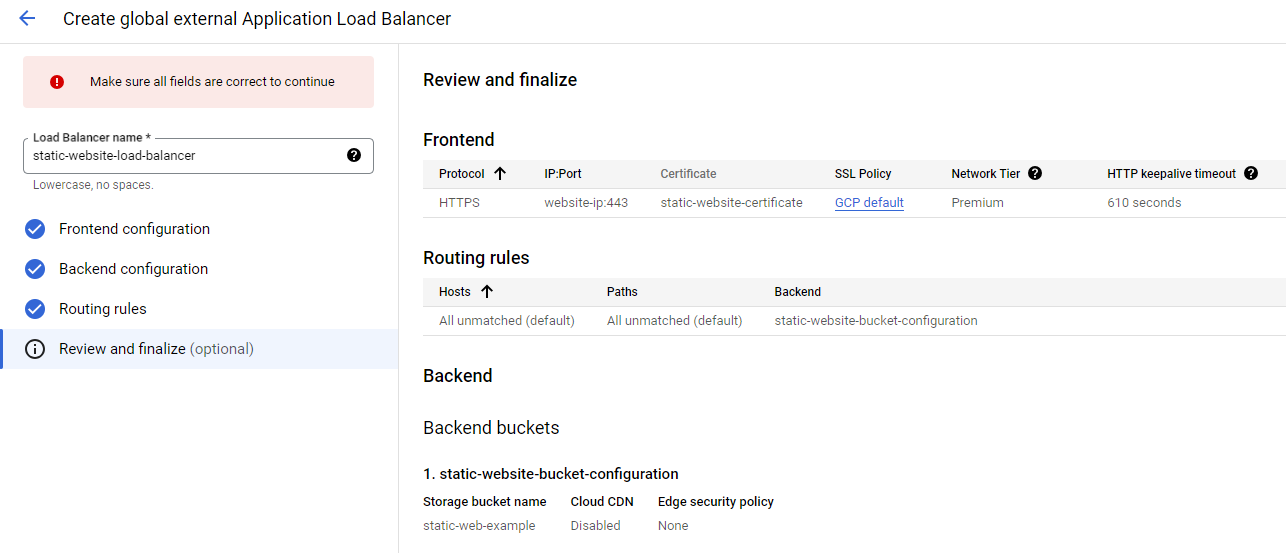
Routing tables
Here there is not much to do, the configuration was configured automatically, so we just need to double check the frontend and backend configuration.
Connecting our domain to the load balancer
Now in our domain provider page, we will add a DNS record. A record A with the load balancer IP as a value, for example:
1
2
3
NAME                  TYPE     DATA
www                   A        30.90.80.100
@                     A        30.90.80.100
Now we just have to wait the replication.
 And all works as expected!!!!