Created a basic bot using Dialogflow CX
Creating a new project
First of all, we will create a new project to split the api we will activate and the resources we are going to create and also when the project is finished, we will deactivate the project billing and delete it to remove all the resources created.
Creating a bot with Dialogflow CX
Once we have a new project, we will go to Dialogflow CX site and select the project that we have recently created.
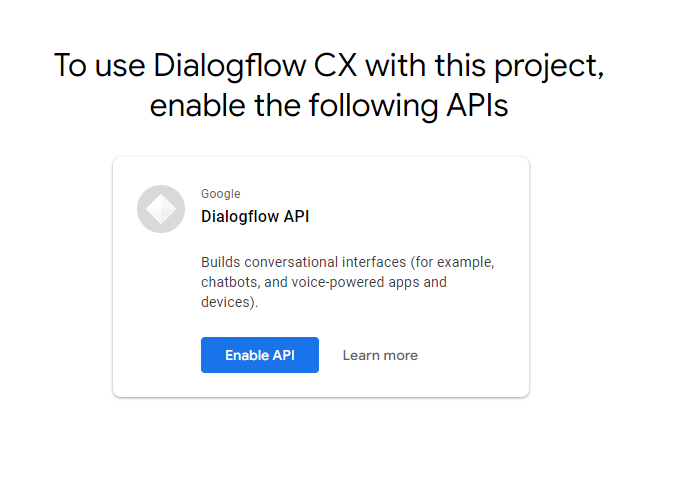
Since this is a new project, we need to enable some APIs, once we have selected the project, will be displayed a message requesting to enable the API.
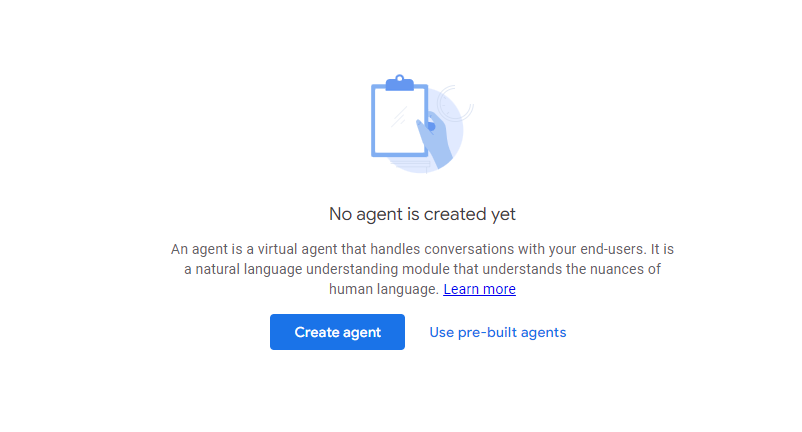
Then, we will see a message letting us know that we have no agents created, we will proceed to create a new one clicking on the Create agent button.
Then two options will be displayed, for this case will select the “Auto-generate” option.

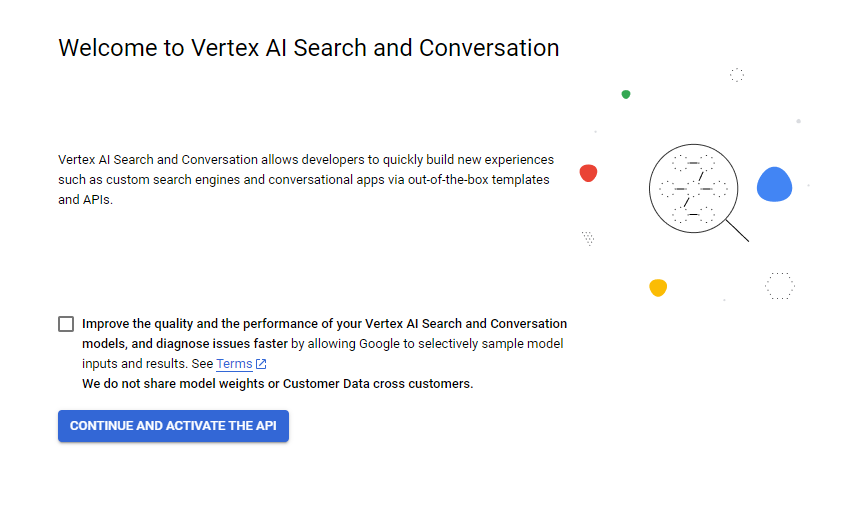
We will need to enable another API, we will click on “Continue and active the API” button.
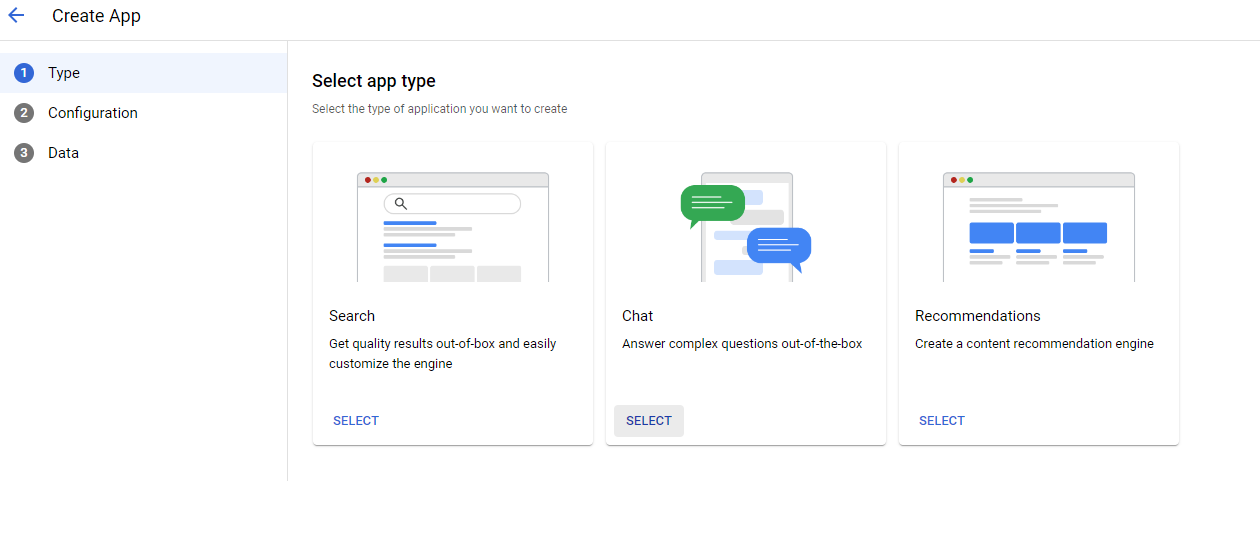
Now a menu will be displayed where we will be setting up the bot configurations.
In the Type section we will select the “Chat” option.
Then, we will fill the “Agent configurations” for this example I filled with random information.
It is important to create the bot in Multi-region in the “Location of your agent” section.

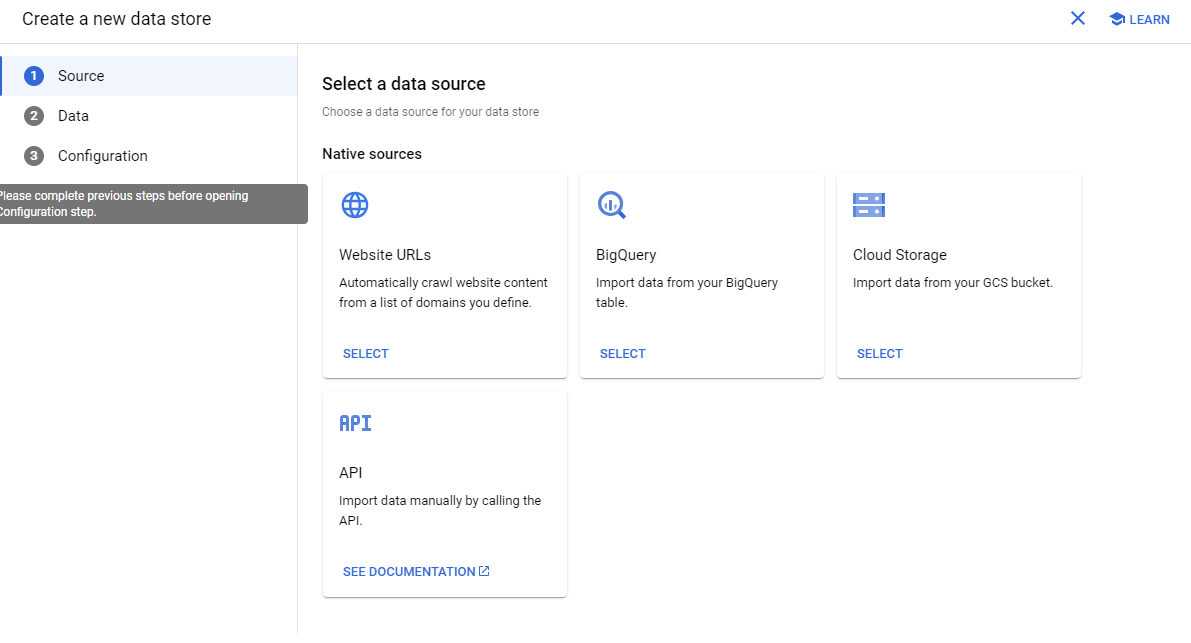
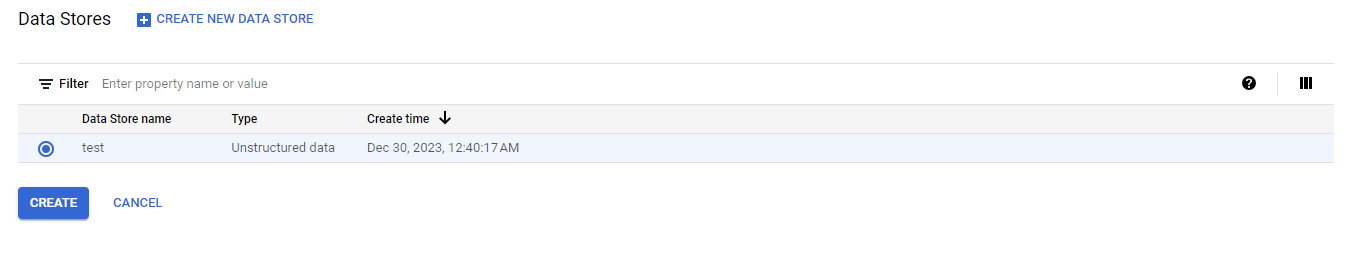
Finally, we need to create a data store, we will click on “CREATE NEW DATA STORE”

We will select “Cloud storage” as our data store.
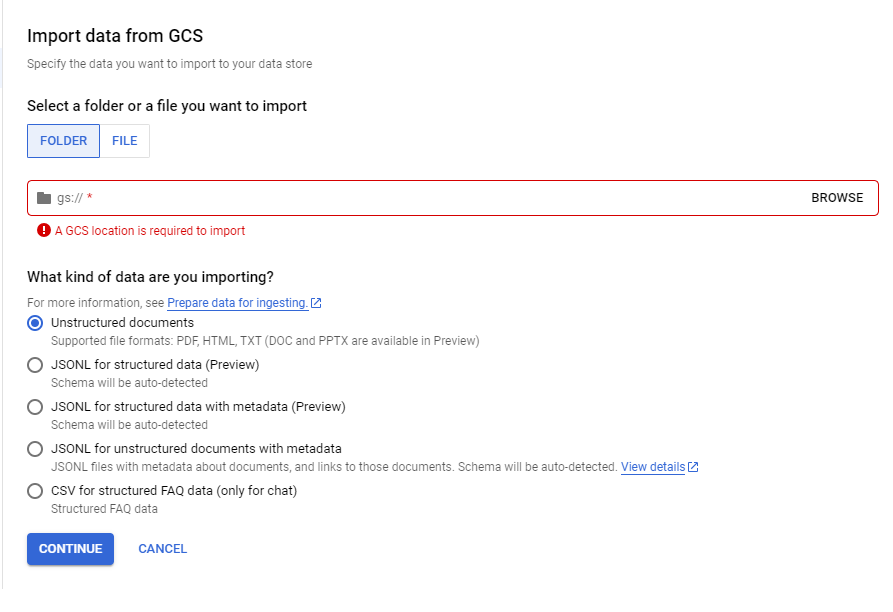
Now, a new window will be displayed, here we need to create the bucket(Cloud Storage) by clicking on the “BROWSE” button.
Then, another window will be displayed, here we will click on the “Create new bucket” button.
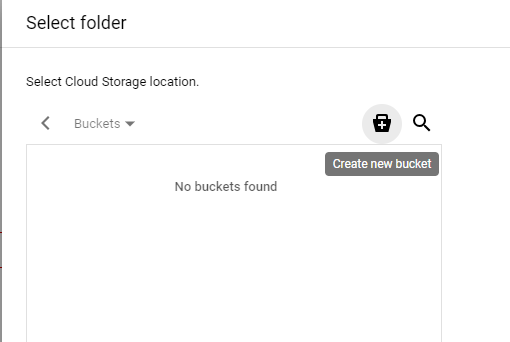
Now, we will create our bucket, with the default configuration should be fine.

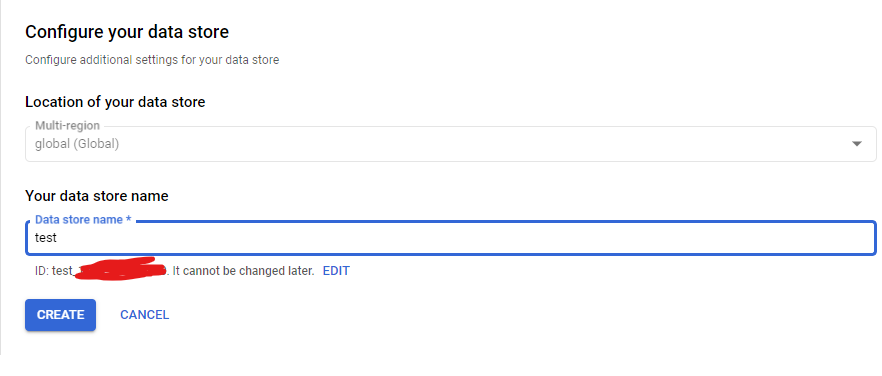
Now, we just name the data store and finally we select the data store created recently to finish the bot creation.
We just need to wait some minutes while the bot is being created.
Setting up the bot.
Now we just need to go to the Dialogflow CX portal and select our project again. But now we will see the bot that we have recently created.
We just need to click on it and will dsplay a new window where we can configure and manage.
Here we will have a template for a basic bot configuration with basic answers for greetings.

We will work with this template.
I created only two new responses.
- One is a custom response for the question Are you working?
- The second if a response for the request, Give me some random numbers.
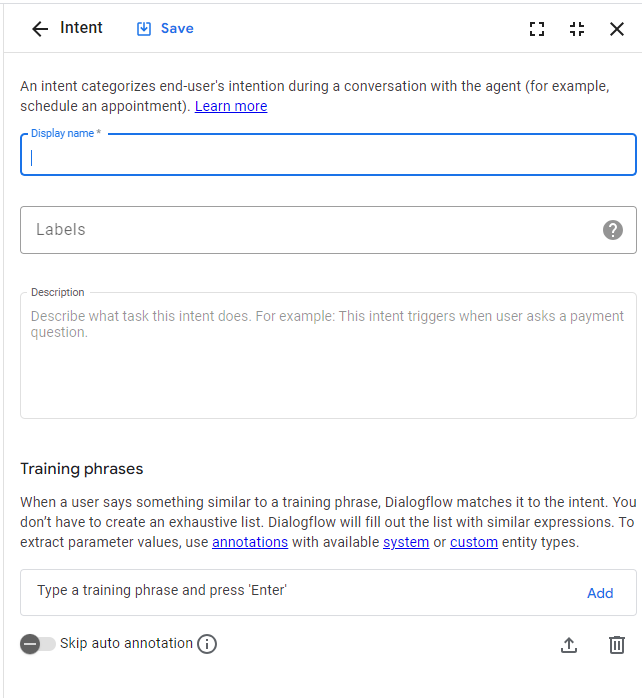
We need to click on the plus button in the “Routes section” we select “New intent” and will assign the name for this intent and add some phrases that the end user could type for get the desired response. 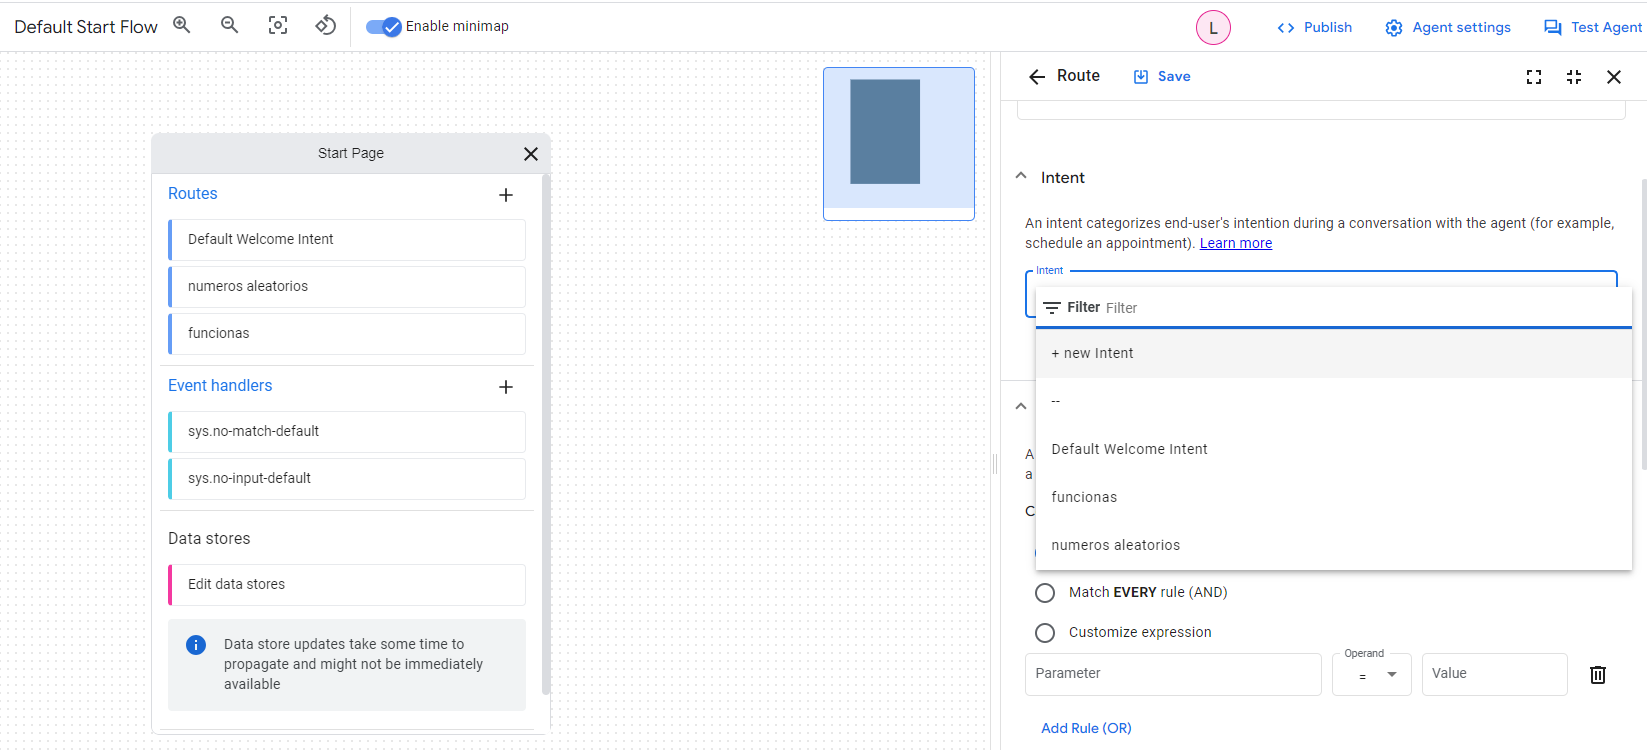
Setting up random numbers option
In this part, when we create a new intent, we have to “train” the bot to let it know about what the end user will ask and what it has to respond.
I just added some phrases as “give me random number” and in the agent response I added “1, 2, 3, 4 ,5” as a response and saved it. 
Setting up Are you working? option
In this option, after created the new intent, the phrases I added as part of the “train” was “Are you working?”, “Are you working” and for the response for the end user I added “yes, me the bot, I’m working correctly.”

The bot has few interactions, but it’s only for practice purposes.
Now, we can deploy or test the bot by chatting with it, but I want to integrate a phone number, so that the end user can call and get an answer from the bot without chatting with the bot.
Using Dialogflow CX only will let you use US phone numbers.
Integrating a phone number
We need to click on the manage tab and click on the “Manage” button on the CX Phone Gateway section. 
Now a new window will be displayed and here we will add the phone number, we will click on the “Request” button. 
Now, we will select the phone number we want and fill in the blanks with information about the “company” and the language of the bot.
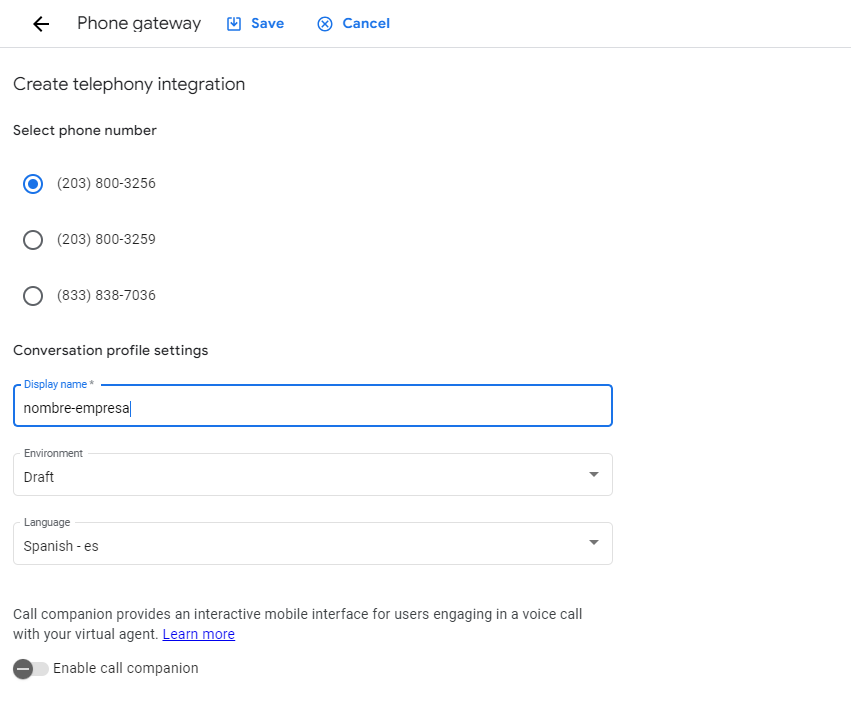
Now, phone number is assigned to our bot.
Finally we can just simply call it and test with the phrases we use to train the bot and wait for a response.